Introduction
In this article, we will describe how to control Aximmetry with MIDI (receiving MIDI messages) and how to control MIDI devices with Aximmetry (sending MIDI messages).
MIDI Hardware (Controller)
MIDI hardware devices do not require additional setup procedures besides connecting them to the PC that is running Aximmetry.
This connection can be any kind, for example, USB, Ethernet, WiFi, MIDI connector, etc.
MIDI Controllers
There are many different MIDI controllers with different types of buttons.
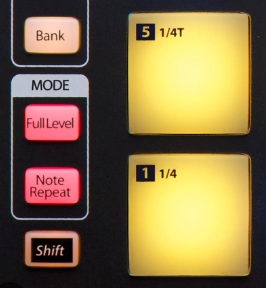
Buttons can be used to toggle settings.
Knobs
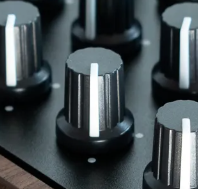
Some knobs have hard stops in each direction. These knobs can be turned between the two stops (minimum and maximum). This is called a range.
Some knobs don't have hard stops, these can be turned any amount in any direction. These types of knobs do not have a range.
Sliders
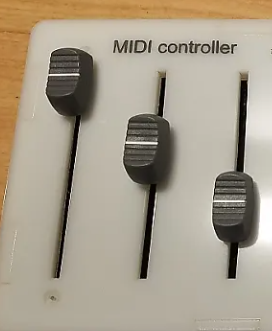
Similar to knobs with range, sliders have a range between a minimum and a maximum value.
Controlling Aximmetry with MIDI
A usual scenario is that the incoming MIDI messages only contain an address and a single floating-point number, integer, logical, or double value. These kinds of messages can be used to control properties and buttons in Aximmetry.
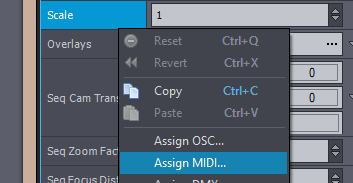
Right-click the name of a numeric or a logical property or a control board button and choose Assign MIDI...
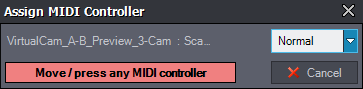
Example in the case of Control Board buttons:

Example in the case of Pin values:
An Assign MIDI Controller window will show up:
Then simply send the appropriate MIDI message from your controller device (e.g. move a fader or press a button) and the assignment is made.
Aximmetry offers different action types to control different settings:
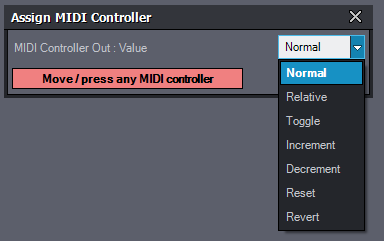
Normal
Can be used when you would like to control a range of values between a minimum and a maximum value using a knob or a slider.
With this type, the minimum value of the range will be the controller button's minimum stop and the maximum value will be the controller button's maximum stop.
Relative
Can be used when you would like to control a pin that does not have a minimum or maximum value, only a default one.
Works best with knobs/sliders without hard stops.
The current position will be the default value of the pin and adjusting the button will increase or decrease the value.
Toggle
Most useful with a controller button. Pressing the button can toggle a boolean (no/yes, or 0/1) value or between the minimum or maximum value of the pin's range.
If a knob/slide is used, moving it in any direction will toggle between the above-mentioned values.
Increment / Decrement
When the controller button is used the pin value will be either increased or decreased.
Reset
When the controller button is used, the pin value will be reset to the default value.
Revert
When the controller button is used, the pin value will be reverted to the previously used value.
Unassign
You can quickly unassign one or all controller(s) directly from the Pin Values panel after right-clicking on the value's name.
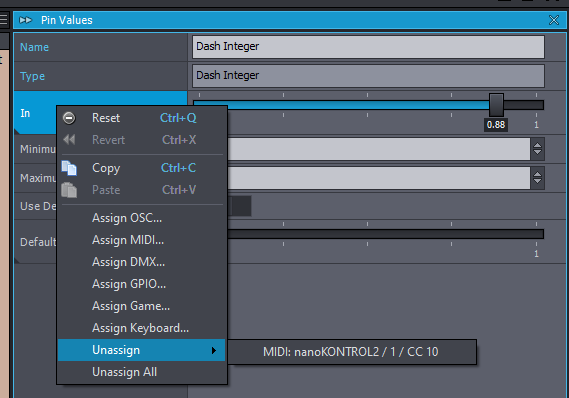
NOTE: Example of the use of the Unassign feature on a Pin value. Its use is identical in the case of Control Boards as well.
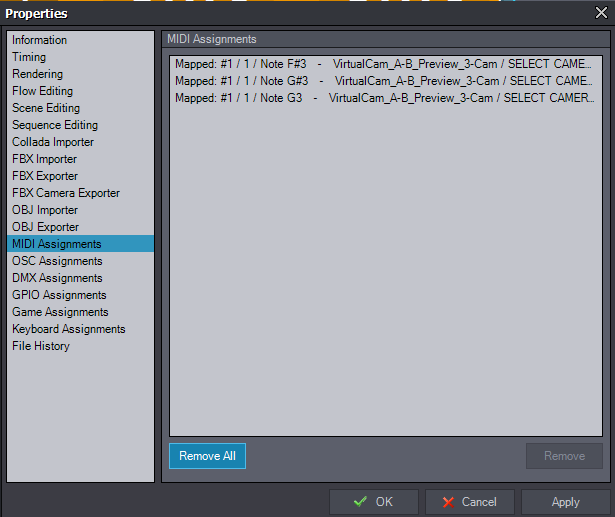
MIDI Assignments
To see and manage all the MIDI Assignments you made in your compound, go to File / Properties / MIDI Assignments.
Controlling the FLOW Editor
You can also build controlling structures in the FLOW Editor using MIDI modules.
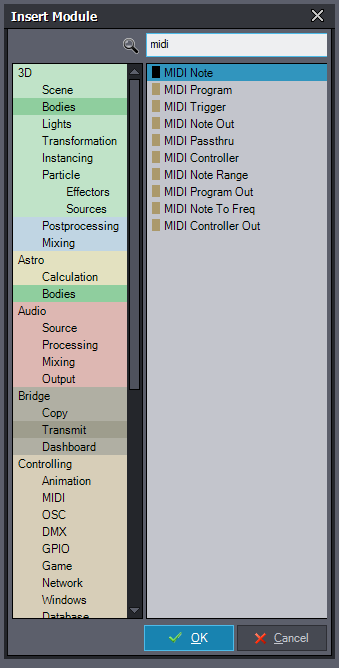
All of the MIDI-related modules can be found in the Insert Module panel. To make it easier to find them, search for "midi":
Frequent MIDI Module Pins
Learn function

All MIDI messages consist of three elements: Device name, Channel number, and Controller number.
All MIDI input modules have the Learn function. If you enable it, Aximmetry will automatically specify the above-mentioned three elements to assign them to the selected parameter in Aximmetry.
Device
The Device pin specifies the MIDI device's name
Channel
The Channel pin specifies the channel number used by the device.
NOTE: MIDI devices use 16 channels, with channel 10 being dedicated to drums to provide timing priority.
Config
The Config pin is an Aximmetry Performer-specific pin.
NOTE: Aximmetry Performer is currently not available.
Controller
The Controller pin specifies the number of the controller on the channel (e.g. CC 2F, Note A-1, Aftertouch A0, etc).
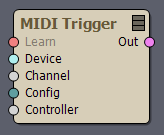
Example of the above-mentioned pins on a MIDI Trigger module:
The MIDI Trigger module sends a signal each time a MIDI message containing any non-zero value arrives.
This, as the name suggests, is very useful if you want to trigger an action in Aximmetry.
For example, start a recording:

Note
MIDI was initially designed to be a Musical Instrument communication protocol, so it is not surprising that you can use it to send musical notes.
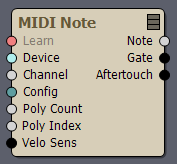
You can receive a musical note with the MIDI Note module.
Poly Count
It is possible to create in Aximmetry a polyphonic synthesizer. To achieve this, you need multiple instances of a MIDI Note ⟶ MIDI Note To Frequency ⟶ Audio Oscillator logic.
The Poly Count pin's value specifies the number of notes the synthesizer can handle.
Example of a monophonic synthesizer:
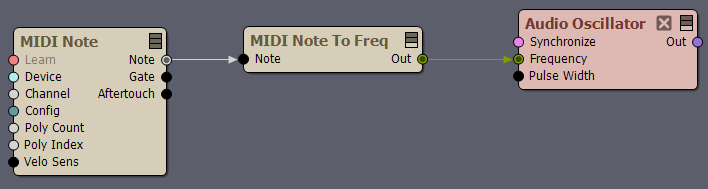
NOTE: By multiplying this logic, a polyphonic synthesizer can be created in Aximmetry.
Poly Index
In the case of polyphonic synthesizers created in Aximmetry, the Poly Index pin value specifies the sequence number of a note on the synthesizer. This allows for playing multiple notes on the synthesizer at the same time.
Example of a 4-note polyphonic synthesizer:
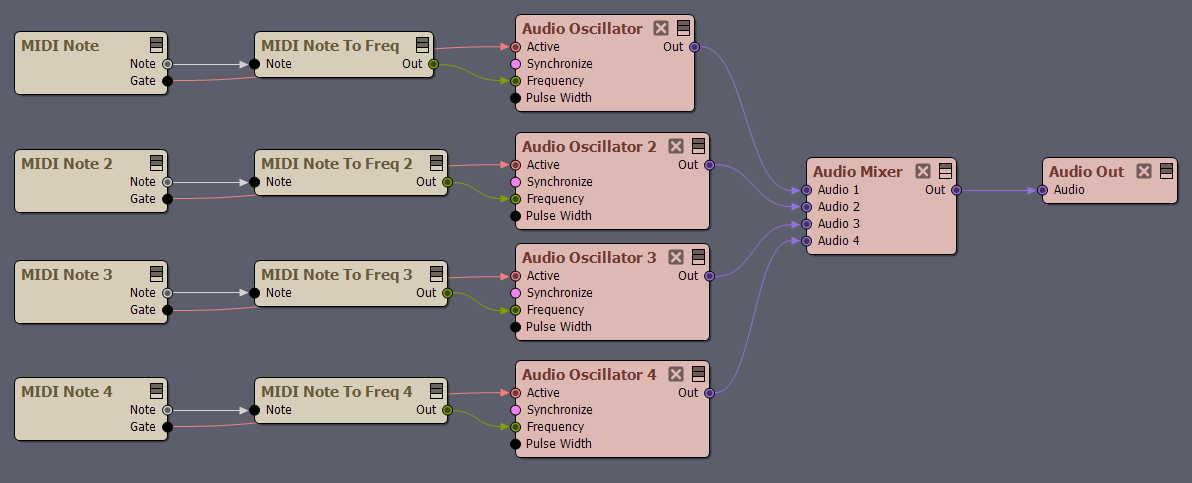
NOTE: Connecting the MIDI Note module's Gate output pin to the Audio Oscillator module's Active in-pin is optional. It allows the output of a note from the Audio Oscillator module only when the MIDI device keyboard/touchpad is pressed. See Gate for information.
To achieve this (e.g. playing 4 notes at the same time on a 4-note polyphonic synthesizer), you'll need to specify as many values within the range of the Poly Count as many notes you want to play at the same time (e.g. if Poly Count is 4, then Poly Index 1, 2, 3, 4 must be specified, to be able to play all four notes at the same time. This requires four monophonic synthesizer logic, such as the one above demonstrated).
NOTE: The highest value of Poly Index must not exceed the value of Poly Count, as it would mean playing more notes at the same time than the number of notes the synthesizer can handle.
Note
It outputs a note.
Gate
Gate tells us whether the MIDI device's keyboard/touchpad is pressed (the default value for the pressed state is 1) or not (the default value for it is 0). If it's pressed, then its output value also depends on the Velo Sens parameter's settings (see later), when the Velo Sens parameter's value is higher than zero.
Velo Sens
The Velocity Sensitivity defines how much the speed at which the MIDI device's keyboard/touchpad is pressed down (called velocity) impacts the Gate pin's output.
If the Velocity Sensitivity is set to zero, then the velocity does not affect the Gate pin's output signal. (Its output value is either 0 or 1.)
If the Velocity Sensitivity is higher than zero, then the velocity affects the Gate pin's output signal. (Its output value is 0 or a value between (1 - Velocity Sensitivity) and 1. The actual velocity will be scaled into this range.)
Aftertouch
Aftertouch tells us about the pressure on the MIDI device's keyboard/touchpad after it has been pressed. Its value ranges between 0 and 1.
There are two types of Aftertouch on MIDI devices:
- Channel Aftertouch: this is a generic value that affects every key/touchpad of the MIDI device
- Polyphonic Aftertouch: this is a specific value that affects a single key/touchpad of the MIDI device
Aximmetry processes both of these Aftertouch values per key/touchpad as a single input/output.
Note To Freq
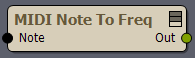
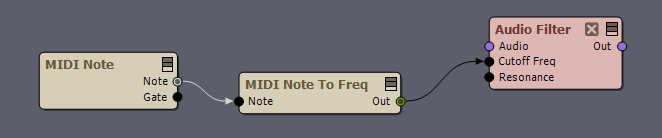
The Note to Frequency module converts notes to frequency.
For example, you can use this module to transform the note into a frequency and use this frequency with an Audio Filter module as a cutoff frequency.
Note Range
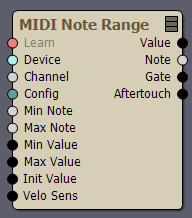
You can also use the MIDI Note Range module to convert MIDI notes to numeric values within a specified range.
This module allows for specifying a range of notes (Min Note, Max Note) and a range of numeric values (Min Value, Max Value). The range of numeric values (Min Value to Max Value) is proportionately divided by the number of notes specified by their range (Min Note=Min Value, Max Note=Max Value). Each note of the range is then converted into a numeric value when triggered by a MIDI message (input signal).
Min Note
The lowest note of the range. (Can be C-1 (0)). Its numeric value equals to Min Value.
Max Note
The highest note of the range. (Can be G-9 (127)). Its numeric value equals to Max Value.
Min Value
Specifies the minimum numeric value of the numeric range.
Max Value
Specifies the maximum numeric value of the numeric range.
Init Value
Specifies the initial numeric value that is output by the module. For notes representing numeric values lower than the initial value, the initial value gets output.
Controller
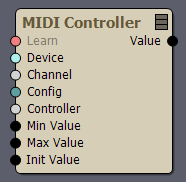
Using the MIDI Controller module, we can get a value sent by a controller.
For example, with a slider, we can control the exposure of our Video Input:
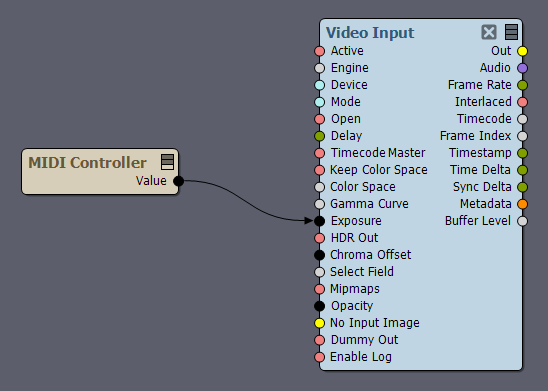
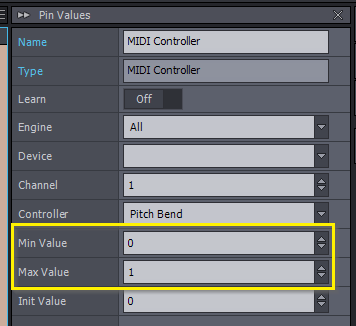
By default, the Min and Max values are set to 0 and 1, respectively. You can change them based on your needs.
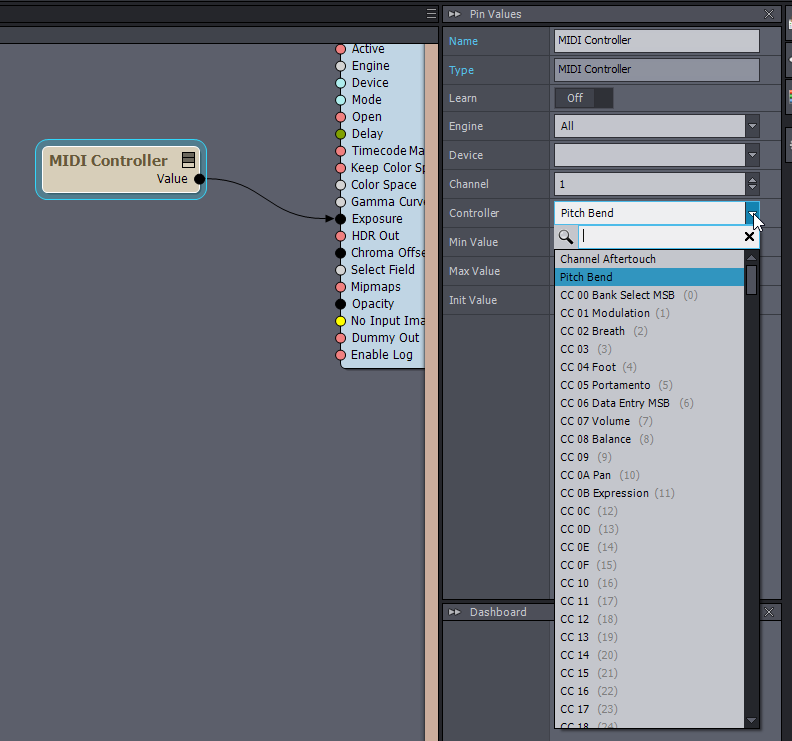
You can pick the type of Controller manually, but you can also use the Learn feature, mentioned before.
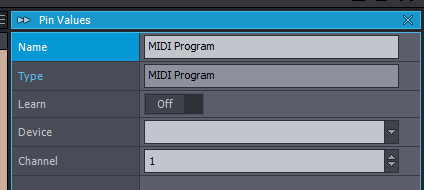
Program
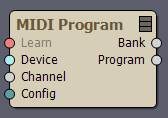
Outputs the last used Bank and Program of a given Channel of a controller device.
Passthru
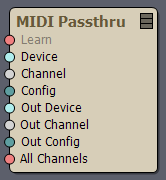
This module allows you to send MIDI messages through Aximmetry from one device to another.
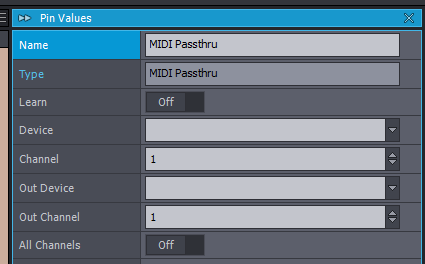
Device: the controller that sends the message to Aximmetry
Out Device: the controller that receives the message from Aximmetry
Special cases
Starting from Aximmetry version 2023.3.0, by default, any MIDI controller can be assigned to control Aximmetry. There are, however, some special MIDI controllers that in previous versions of Aximmetry could not be used for this purpose. These are the following MIDI controllers (the second halves of the entries describe their default MIDI functions):
- CC00 BankSelectMSB
- CC06 DataEntryMSB
- CC20 BankSelectLSB
- CC26 DataEntryLSB
- CC40 DamperPedal
- CC42 Sostenuto
- CC45 Hold2
- CC62 NrpnLSB
- CC63 NrpnMSB
- CC64 RpnLSB
- CC65 RpnMSB
- CC78 AllSoundOff
- CC79 ResetAllControllers
- CC7B AllNotesOff
- CC7C OmniModeOff
- CC7D OmniModeOn
- CC7E MonoMode
- CC7F PolyMode
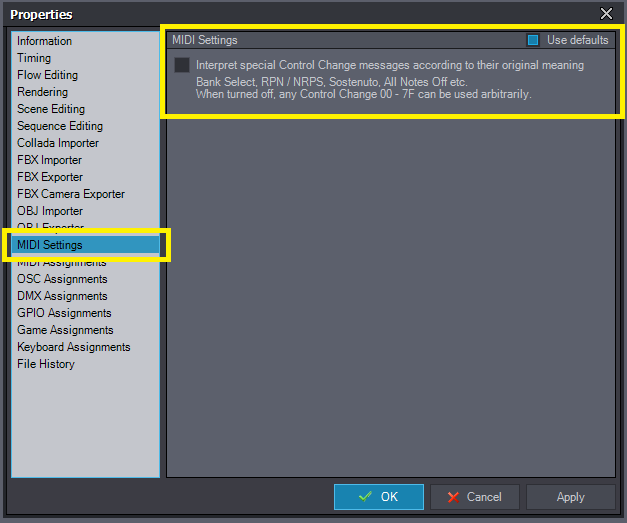
You can toggle between using these MIDI controllers to assign them to Aximmetry functions or use them to their original meaning/function (in which case you cannot assign them to any Aximmetry function).
To do this, head to File \ Properties... in Aximmetry Composer, and select MIDI Settings:
Sending MIDI Messages from Aximmetry
For the opposite scenario, when you want to control external devices from Aximmetry via MIDI use the MIDI * Out modules.
You always have to specify a target Device and a Channel.
You can output as a Controller, a Note, or a Program, using their respective module.
MIDI Controller Out
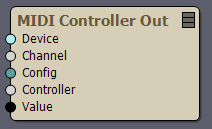
This is the module that lets Aximmetry be a MIDI controller.
You can decide what type of Controller to emulate, what Value to send, and towards what Device and Channel you want the signal to be sent.
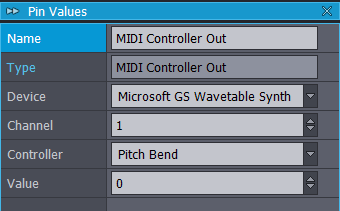
Controller: the kind of Controller you want to emulate.
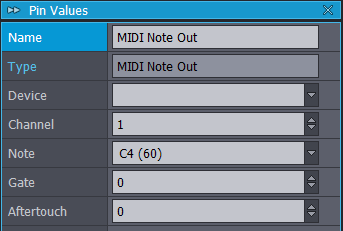
MIDI Note Out
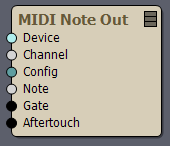
Using the MIDI Note Out, you can send a musical Note to a Device.
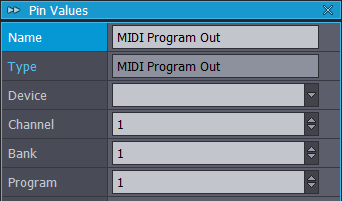
MIDI Program Out
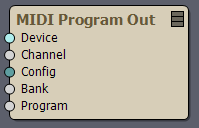
Sends the Bank and Program of the specified Channel to the selected Device.


Introduction
In this article, we will describe how to control Aximmetry with MIDI (receiving MIDI messages) and how to control MIDI devices with Aximmetry (sending MIDI messages).
MIDI Hardware (Controller)
MIDI hardware devices do not require additional setup procedures besides connecting them to the PC that is running Aximmetry.
This connection can be any kind, for example, USB, Ethernet, WiFi, MIDI connector, etc.
MIDI Controllers
There are many different MIDI controllers with different types of buttons.
Buttons
Buttons can be used to toggle settings.
Knobs
Some knobs have hard stops in each direction. These knobs can be turned between the two stops (minimum and maximum). This is called a range.
Some knobs don't have hard stops, these can be turned any amount in any direction. These types of knobs do not have a range.
Sliders
Similar to knobs with range, sliders have a range between a minimum and a maximum value.
Controlling Aximmetry with MIDI
Controlling Module Properties and Control Board Buttons
A usual scenario is that the incoming MIDI messages only contain an address and a single floating-point number, integer, logical, or double value. These kinds of messages can be used to control properties and buttons in Aximmetry.
Right-click the name of a numeric or a logical property or a control board button and choose Assign MIDI...
Example in the case of Control Board buttons:

Example in the case of Pin values:

An Assign MIDI Controller window will show up:

Then simply send the appropriate MIDI message from your controller device (e.g. move a fader or press a button) and the assignment is made.
Controller Action Types
Aximmetry offers different action types to control different settings:

Normal
Can be used when you would like to control a range of values between a minimum and a maximum value using a knob or a slider.
With this type, the minimum value of the range will be the controller button's minimum stop and the maximum value will be the controller button's maximum stop.
Relative
Can be used when you would like to control a pin that does not have a minimum or maximum value, only a default one.
Works best with knobs/sliders without hard stops.
The current position will be the default value of the pin and adjusting the button will increase or decrease the value.
Toggle
Most useful with a controller button. Pressing the button can toggle a boolean (no/yes, or 0/1) value or between the minimum or maximum value of the pin's range.
If a knob/slide is used, moving it in any direction will toggle between the above-mentioned values.
Increment / Decrement
When the controller button is used the pin value will be either increased or decreased.
Reset
When the controller button is used, the pin value will be reset to the default value.
Revert
When the controller button is used, the pin value will be reverted to the previously used value.
Unassign
You can quickly unassign one or all controller(s) directly from the Pin Values panel after right-clicking on the value's name.

NOTE: Example of the use of the Unassign feature on a Pin value. Its use is identical in the case of Control Boards as well.
MIDI Assignments
To see and manage all the MIDI Assignments you made in your compound, go to File / Properties / MIDI Assignments.
Controlling the FLOW Editor
You can also build controlling structures in the FLOW Editor using MIDI modules.
All of the MIDI-related modules can be found in the Insert Module panel. To make it easier to find them, search for "midi":

Frequent MIDI Module Pins
Learn function
All MIDI messages consist of three elements: Device name, Channel number, and Controller number.
All MIDI input modules have the Learn function. If you enable it, Aximmetry will automatically specify the above-mentioned three elements to assign them to the selected parameter in Aximmetry.
Device
The Device pin specifies the MIDI device's name
Channel
The Channel pin specifies the channel number used by the device.
NOTE: MIDI devices use 16 channels, with channel 10 being dedicated to drums to provide timing priority.
Config
The Config pin is an Aximmetry Performer-specific pin.
NOTE: Aximmetry Performer is currently not available.
Controller
The Controller pin specifies the number of the controller on the channel (e.g. CC 2F, Note A-1, Aftertouch A0, etc).
Example of the above-mentioned pins on a MIDI Trigger module:

Trigger
The MIDI Trigger module sends a signal each time a MIDI message containing any non-zero value arrives.
This, as the name suggests, is very useful if you want to trigger an action in Aximmetry.
For example, start a recording:

Note
MIDI was initially designed to be a Musical Instrument communication protocol, so it is not surprising that you can use it to send musical notes.
You can receive a musical note with the MIDI Note module.
Poly Count
It is possible to create in Aximmetry a polyphonic synthesizer. To achieve this, you need multiple instances of a MIDI Note ⟶ MIDI Note To Frequency ⟶ Audio Oscillator logic.
The Poly Count pin's value specifies the number of notes the synthesizer can handle.
Example of a monophonic synthesizer:

NOTE: By multiplying this logic, a polyphonic synthesizer can be created in Aximmetry.
Poly Index
In the case of polyphonic synthesizers created in Aximmetry, the Poly Index pin value specifies the sequence number of a note on the synthesizer. This allows for playing multiple notes on the synthesizer at the same time.
Example of a 4-note polyphonic synthesizer:

NOTE: Connecting the MIDI Note module's Gate output pin to the Audio Oscillator module's Active in-pin is optional. It allows the output of a note from the Audio Oscillator module only when the MIDI device keyboard/touchpad is pressed. See Gate for information.
To achieve this (e.g. playing 4 notes at the same time on a 4-note polyphonic synthesizer), you'll need to specify as many values within the range of the Poly Count as many notes you want to play at the same time (e.g. if Poly Count is 4, then Poly Index 1, 2, 3, 4 must be specified, to be able to play all four notes at the same time. This requires four monophonic synthesizer logic, such as the one above demonstrated).
NOTE: The highest value of Poly Index must not exceed the value of Poly Count, as it would mean playing more notes at the same time than the number of notes the synthesizer can handle.
Note
It outputs a note.
Gate
Gate tells us whether the MIDI device's keyboard/touchpad is pressed (the default value for the pressed state is 1) or not (the default value for it is 0). If it's pressed, then its output value also depends on the Velo Sens parameter's settings (see later), when the Velo Sens parameter's value is higher than zero.
Velo Sens
The Velocity Sensitivity defines how much the speed at which the MIDI device's keyboard/touchpad is pressed down (called velocity) impacts the Gate pin's output.
If the Velocity Sensitivity is set to zero, then the velocity does not affect the Gate pin's output signal. (Its output value is either 0 or 1.)
If the Velocity Sensitivity is higher than zero, then the velocity affects the Gate pin's output signal. (Its output value is 0 or a value between (1 - Velocity Sensitivity) and 1. The actual velocity will be scaled into this range.)
Aftertouch
Aftertouch tells us about the pressure on the MIDI device's keyboard/touchpad after it has been pressed. Its value ranges between 0 and 1.
There are two types of Aftertouch on MIDI devices:
Aximmetry processes both of these Aftertouch values per key/touchpad as a single input/output.
Note To Freq
The Note to Frequency module converts notes to frequency.

For example, you can use this module to transform the note into a frequency and use this frequency with an Audio Filter module as a cutoff frequency.
Note Range
You can also use the MIDI Note Range module to convert MIDI notes to numeric values within a specified range.
This module allows for specifying a range of notes (Min Note, Max Note) and a range of numeric values (Min Value, Max Value). The range of numeric values (Min Value to Max Value) is proportionately divided by the number of notes specified by their range (Min Note=Min Value, Max Note=Max Value). Each note of the range is then converted into a numeric value when triggered by a MIDI message (input signal).
Min Note
The lowest note of the range. (Can be C-1 (0)). Its numeric value equals to Min Value.
Max Note
The highest note of the range. (Can be G-9 (127)). Its numeric value equals to Max Value.
Min Value
Specifies the minimum numeric value of the numeric range.
Max Value
Specifies the maximum numeric value of the numeric range.
Init Value
Specifies the initial numeric value that is output by the module. For notes representing numeric values lower than the initial value, the initial value gets output.
Controller
Using the MIDI Controller module, we can get a value sent by a controller.
For example, with a slider, we can control the exposure of our Video Input:
By default, the Min and Max values are set to 0 and 1, respectively. You can change them based on your needs.
You can pick the type of Controller manually, but you can also use the Learn feature, mentioned before.
Program
Outputs the last used Bank and Program of a given Channel of a controller device.
Passthru
This module allows you to send MIDI messages through Aximmetry from one device to another.
Device: the controller that sends the message to Aximmetry
Out Device: the controller that receives the message from Aximmetry
Special cases
Starting from Aximmetry version 2023.3.0, by default, any MIDI controller can be assigned to control Aximmetry. There are, however, some special MIDI controllers that in previous versions of Aximmetry could not be used for this purpose. These are the following MIDI controllers (the second halves of the entries describe their default MIDI functions):
You can toggle between using these MIDI controllers to assign them to Aximmetry functions or use them to their original meaning/function (in which case you cannot assign them to any Aximmetry function).

To do this, head to File \ Properties... in Aximmetry Composer, and select MIDI Settings:
Sending MIDI Messages from Aximmetry
For the opposite scenario, when you want to control external devices from Aximmetry via MIDI use the MIDI * Out modules.
You always have to specify a target Device and a Channel.
You can output as a Controller, a Note, or a Program, using their respective module.
MIDI Controller Out
This is the module that lets Aximmetry be a MIDI controller.
You can decide what type of Controller to emulate, what Value to send, and towards what Device and Channel you want the signal to be sent.
Controller: the kind of Controller you want to emulate.
MIDI Note Out
Using the MIDI Note Out, you can send a musical Note to a Device.
MIDI Program Out
Sends the Bank and Program of the specified Channel to the selected Device.